Easter Egg Flower Arrangements

Welcome to the new and improved chloerose.co. Thank you for your patience while the new site was being developed. I hope you like the new design as much as I do!

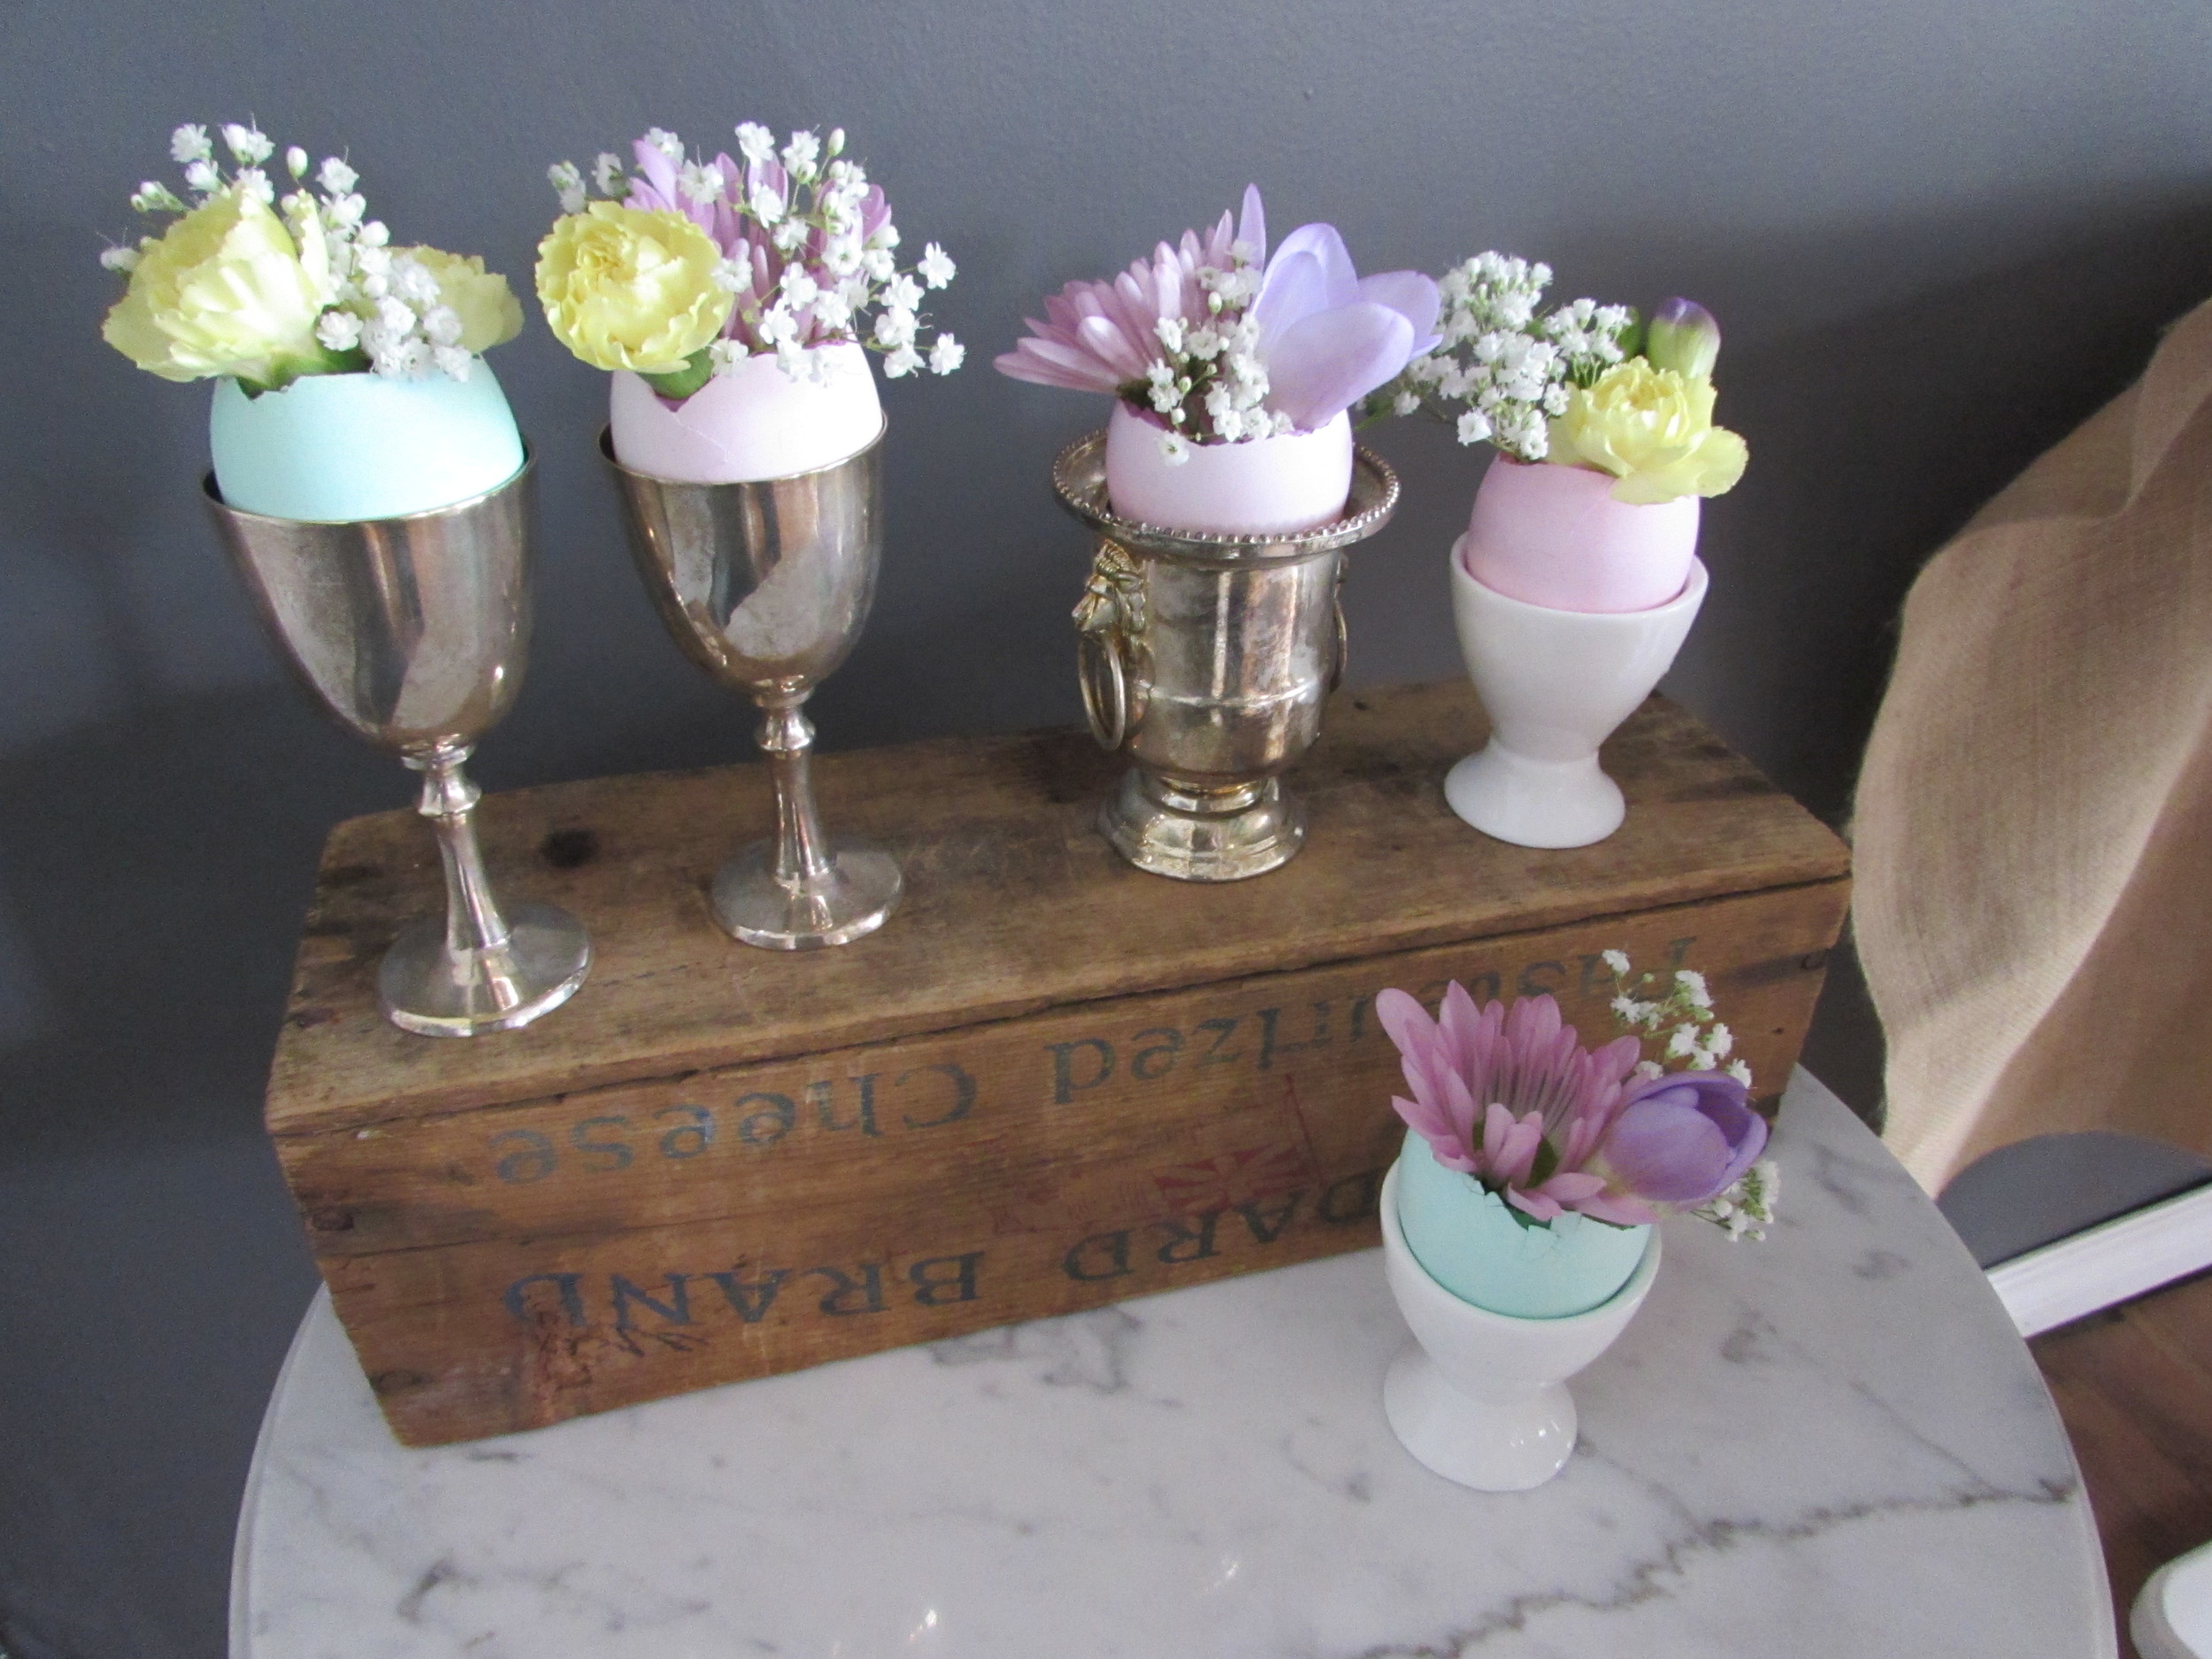
Today, I am sharing my new favourite way to use Easter eggs--as fresh spring vases! Perfect for your Easter table setting, these gorgeous mini-arrangements are easy to create and the colour/flower combinations are endless. 

  1. Carefully cut off the top of a large egg and clean out the shell.
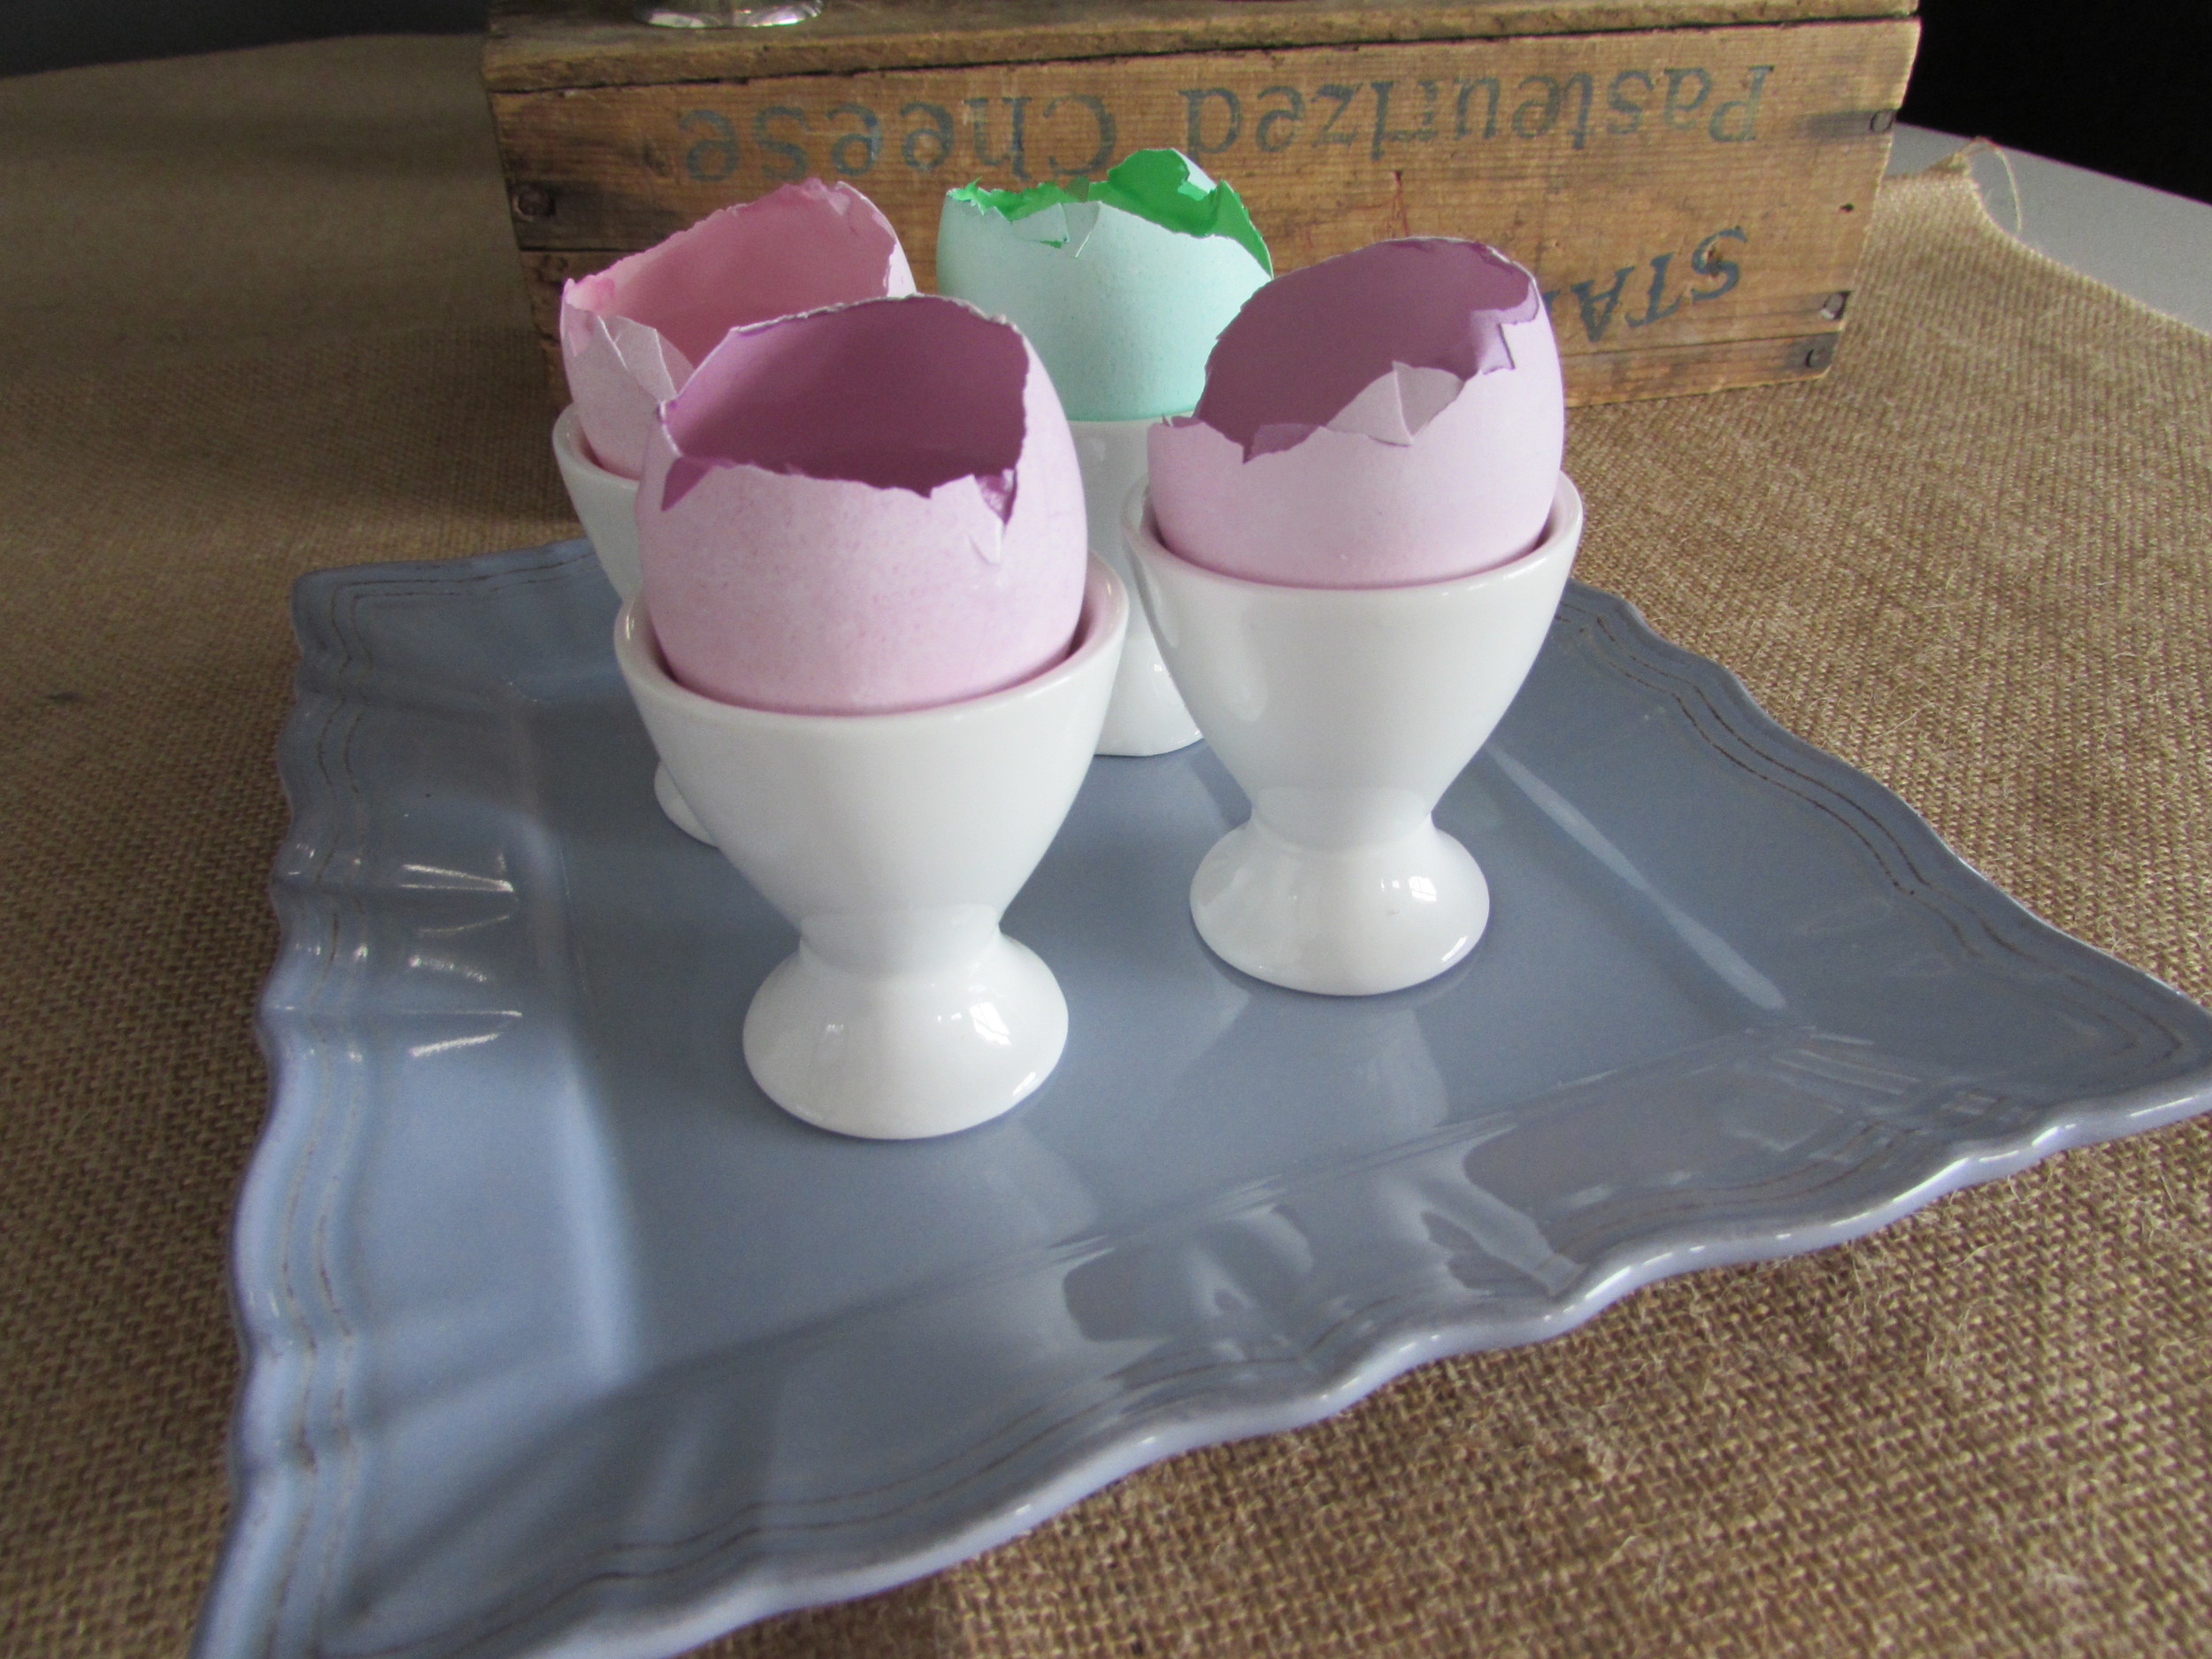
  2. I dyed my eggs in basic food colouring. I didn't leave them in the dye for very long, creating more pastel shades of pink, purple and mint. 
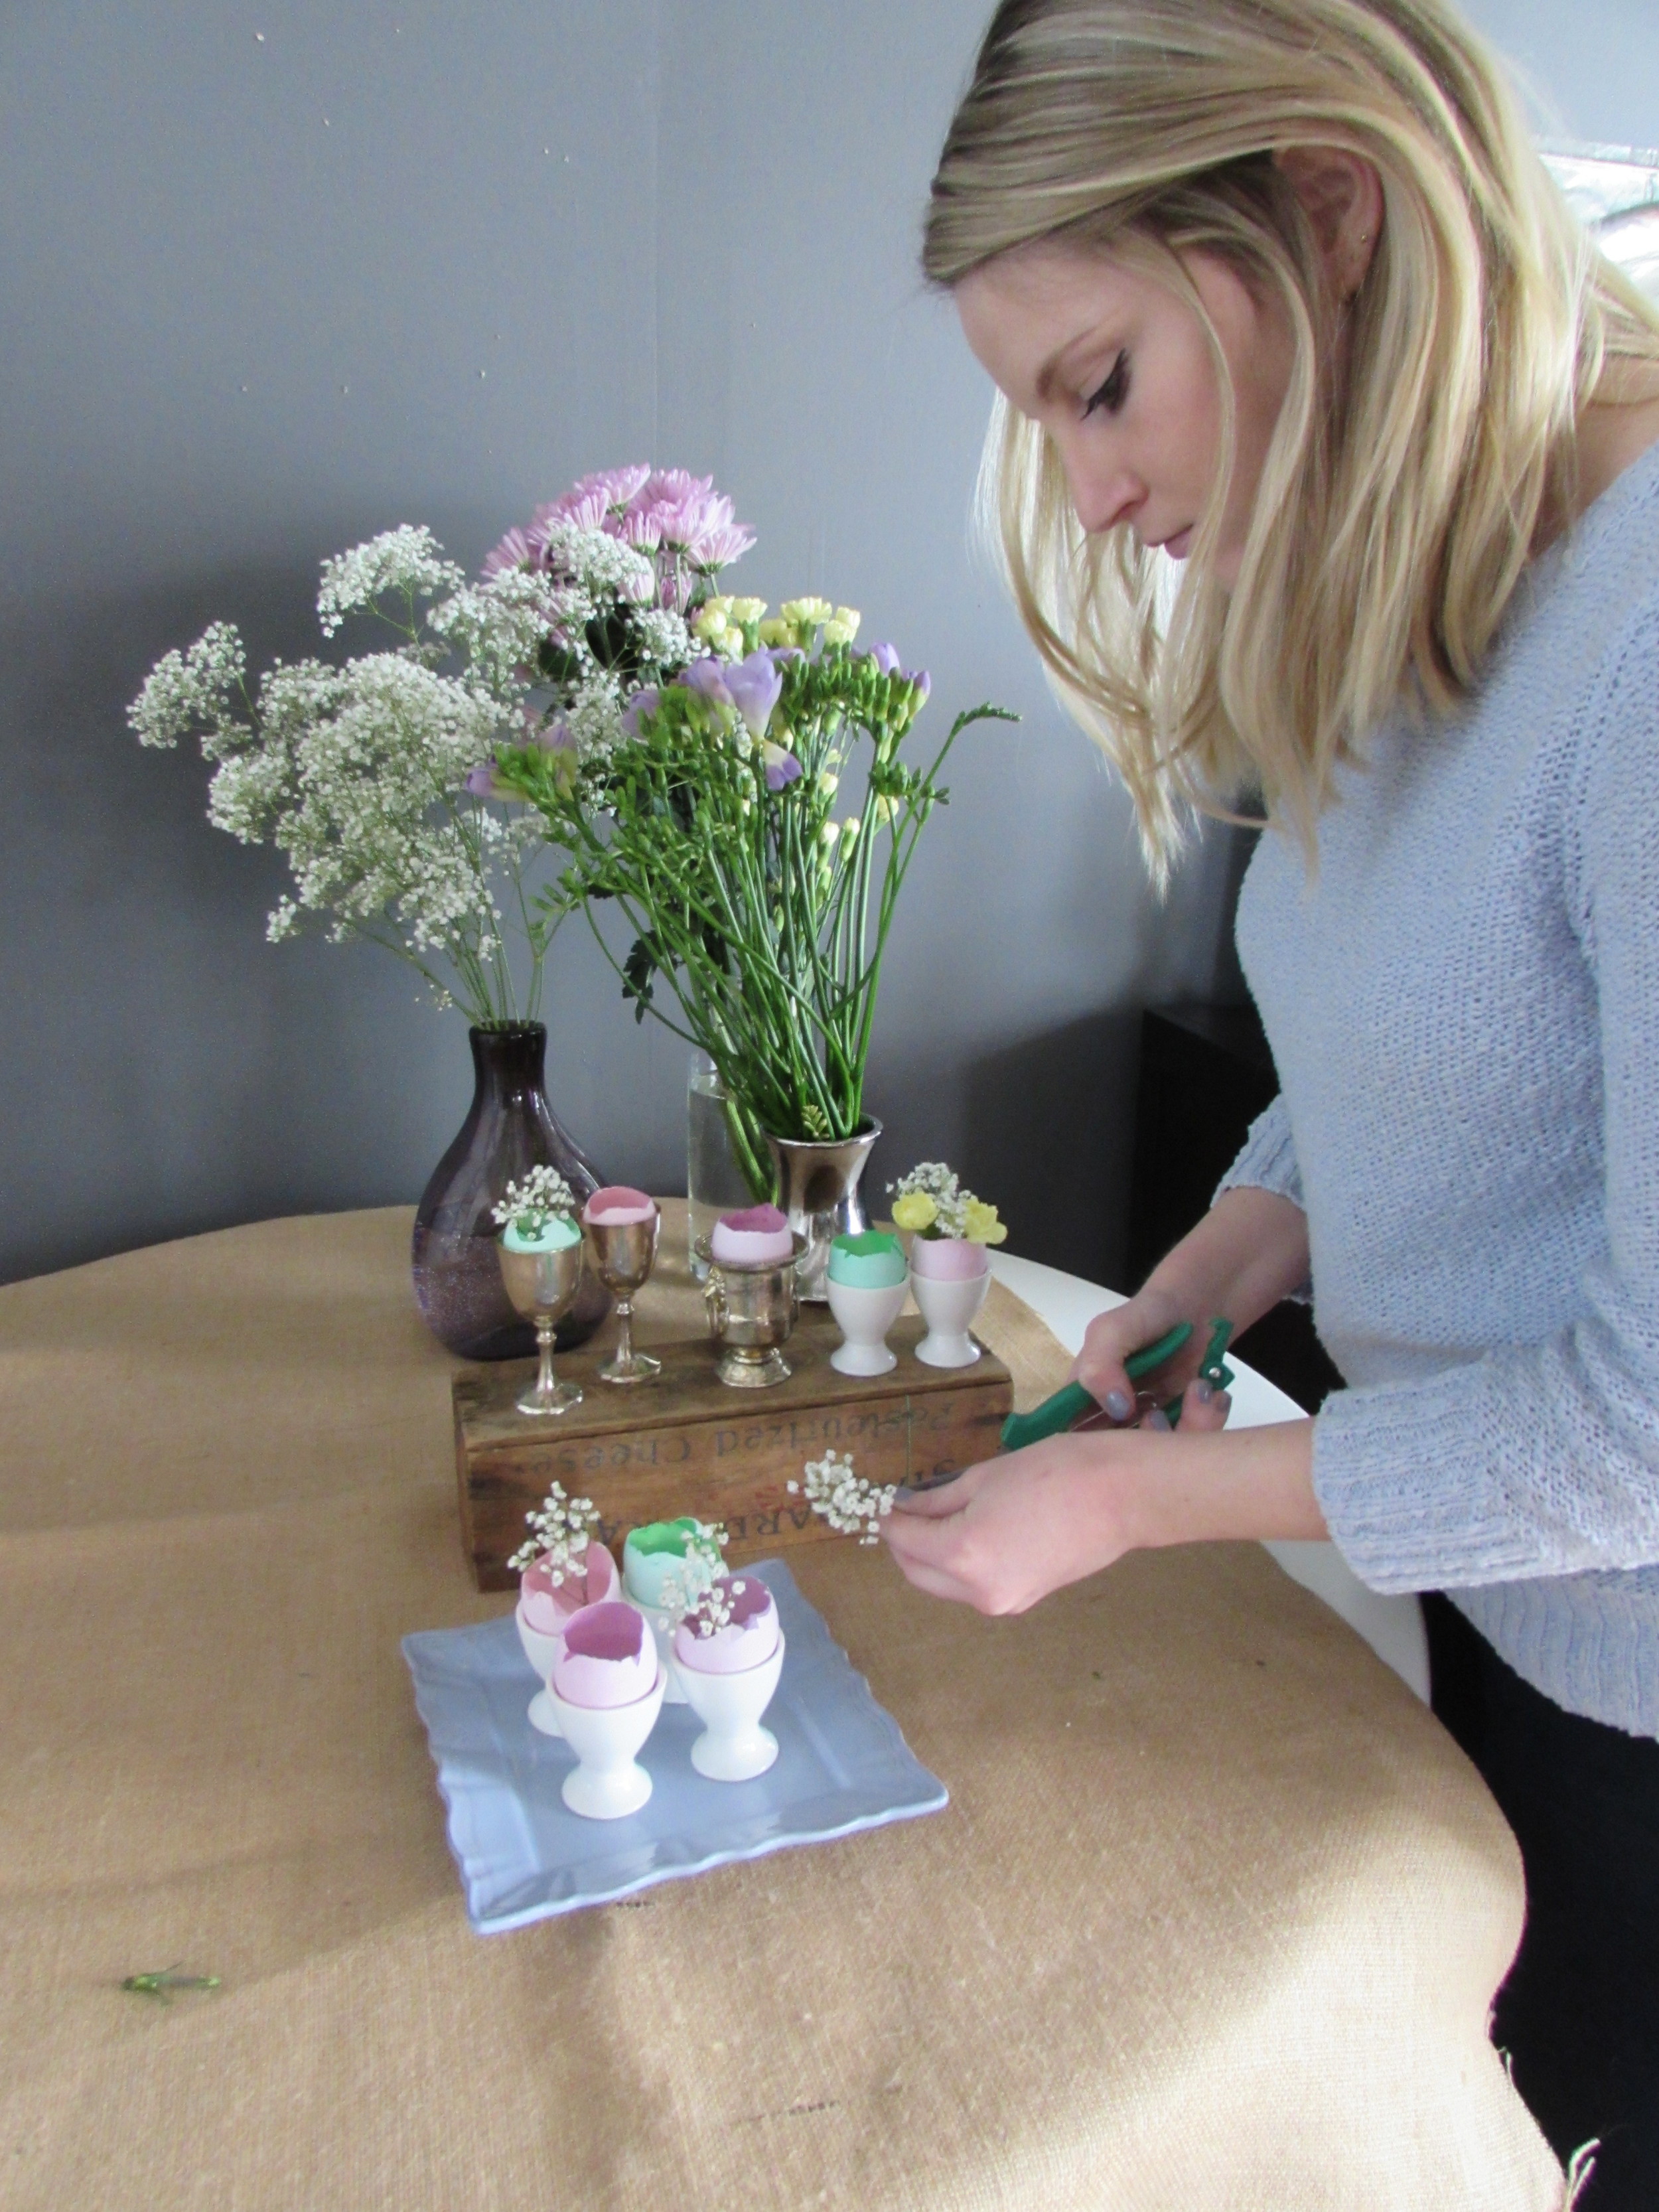
  3. Once the dye dries, place the eggs in your egg cups. I used white ceramic eggs cups, as well as vintage pieces I had around the house. 
  4. Fill the eggs with room temperature water and flower food. 

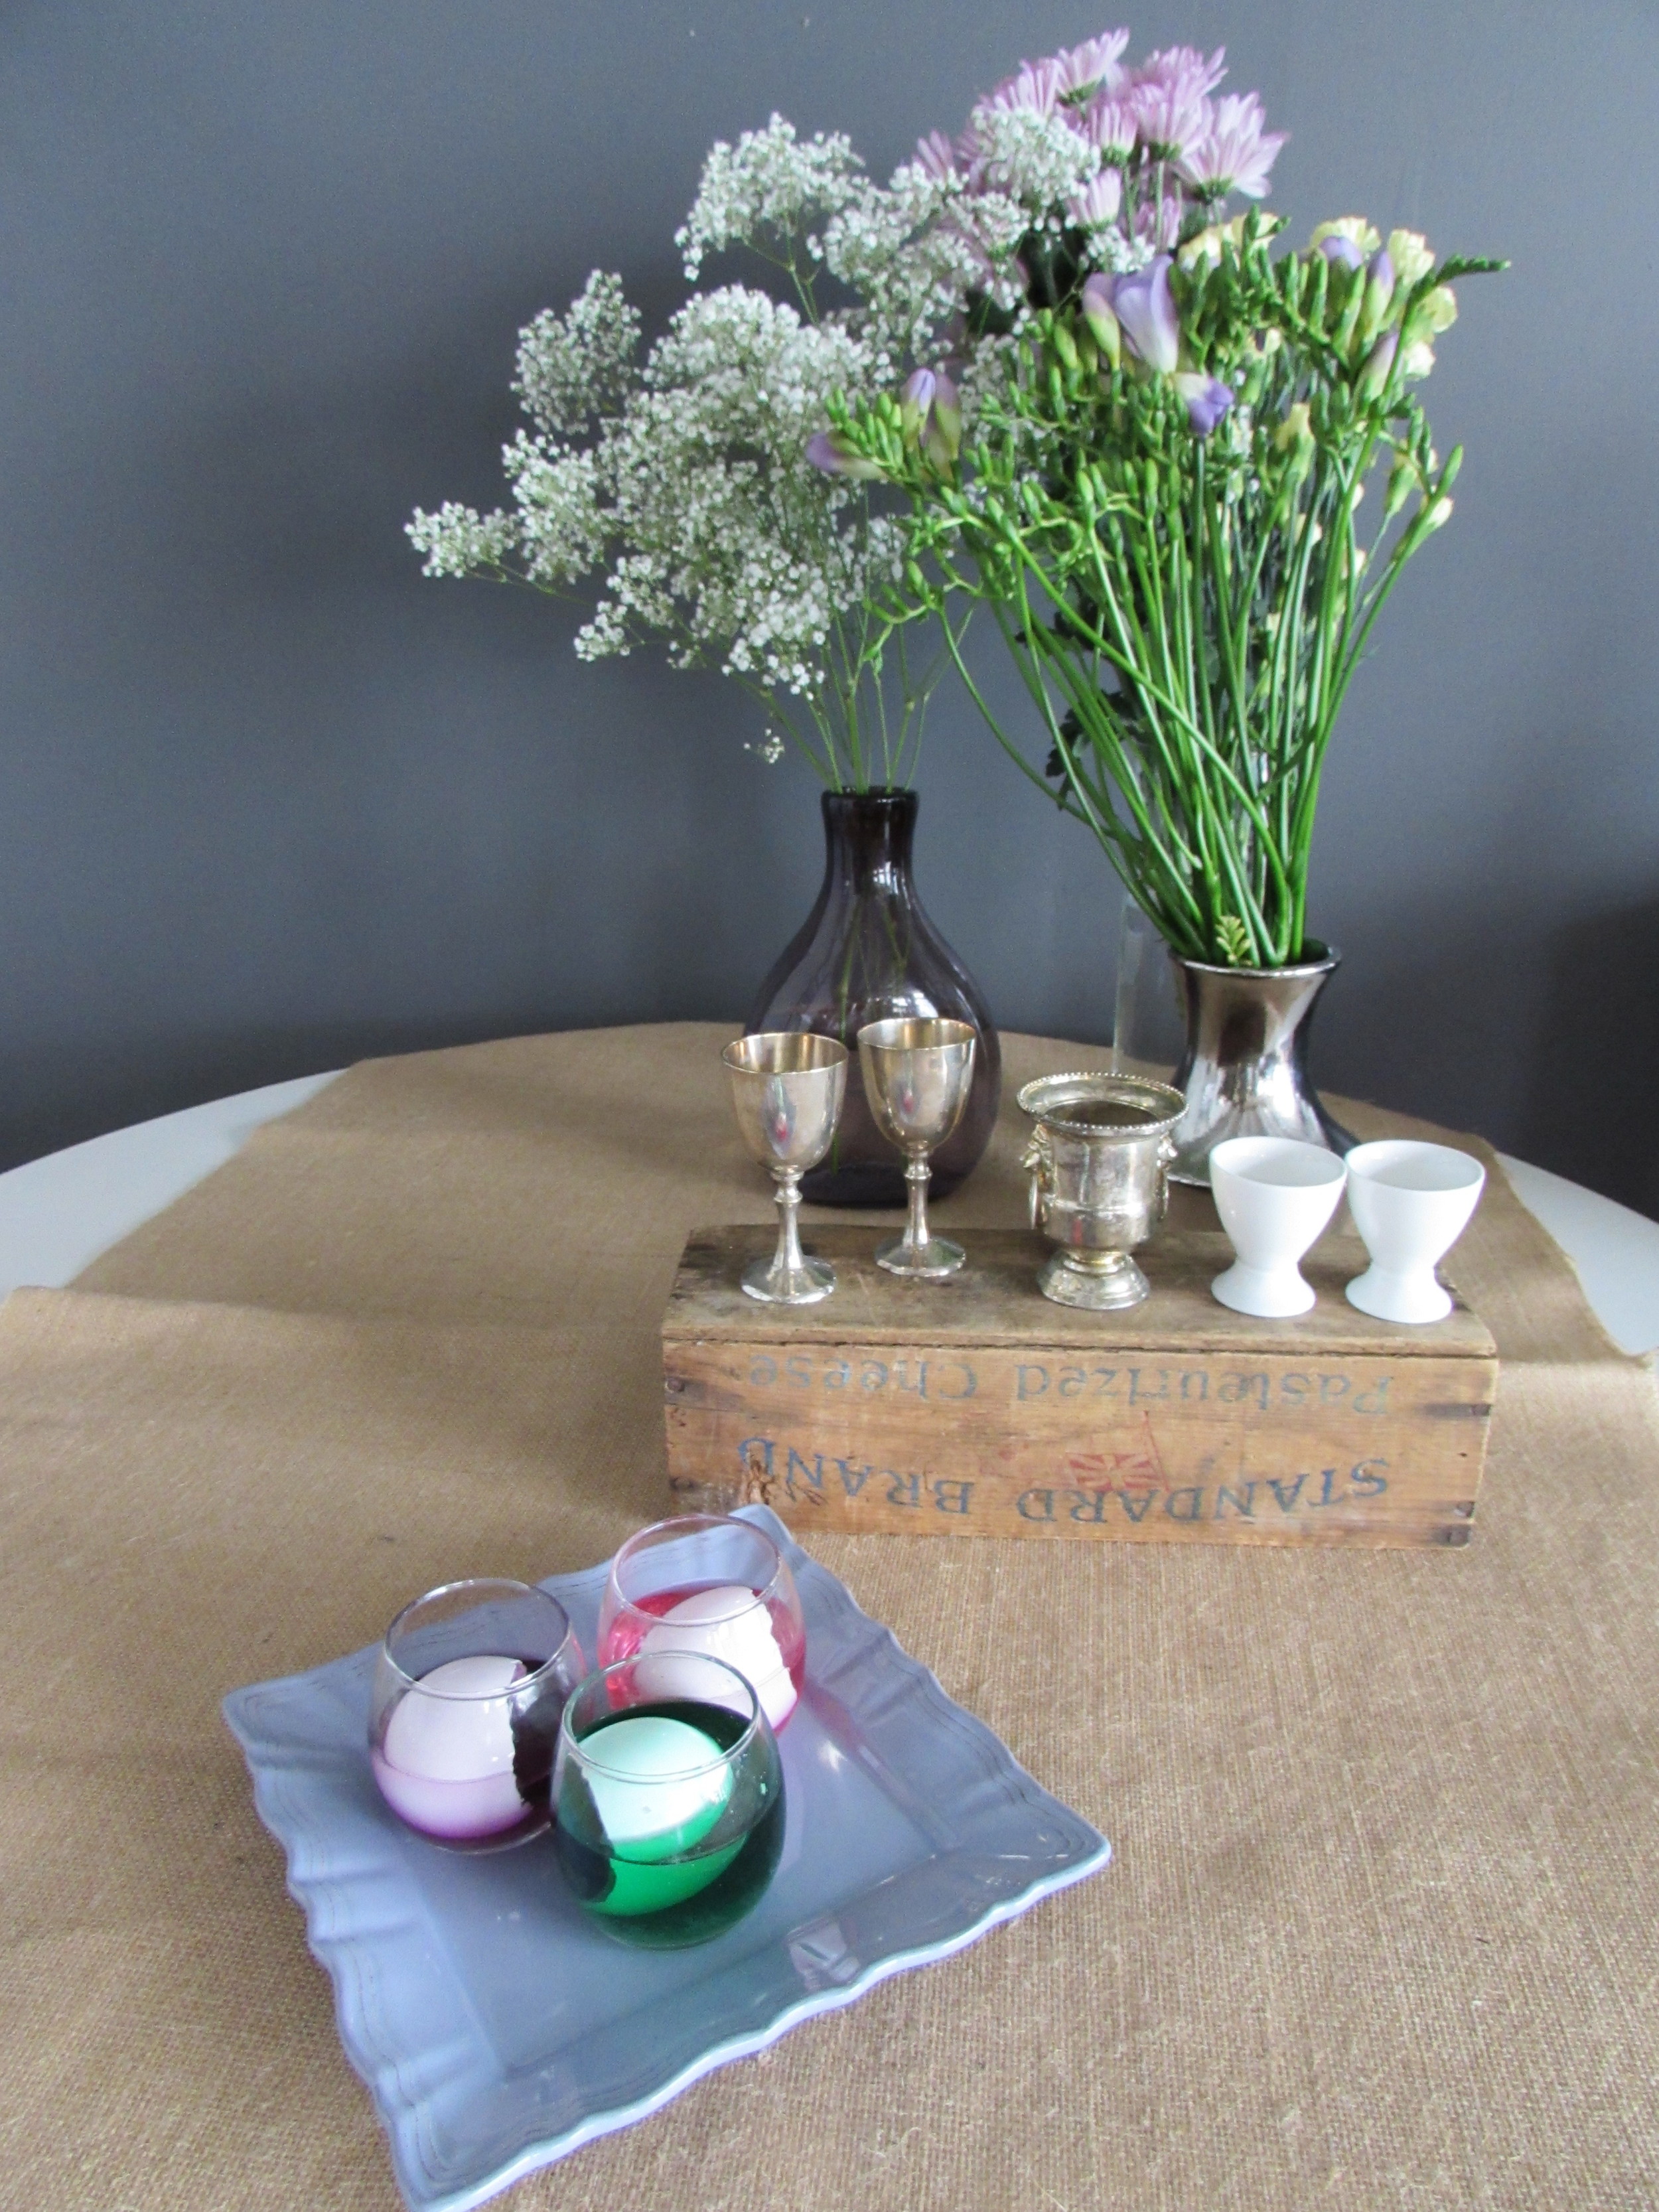
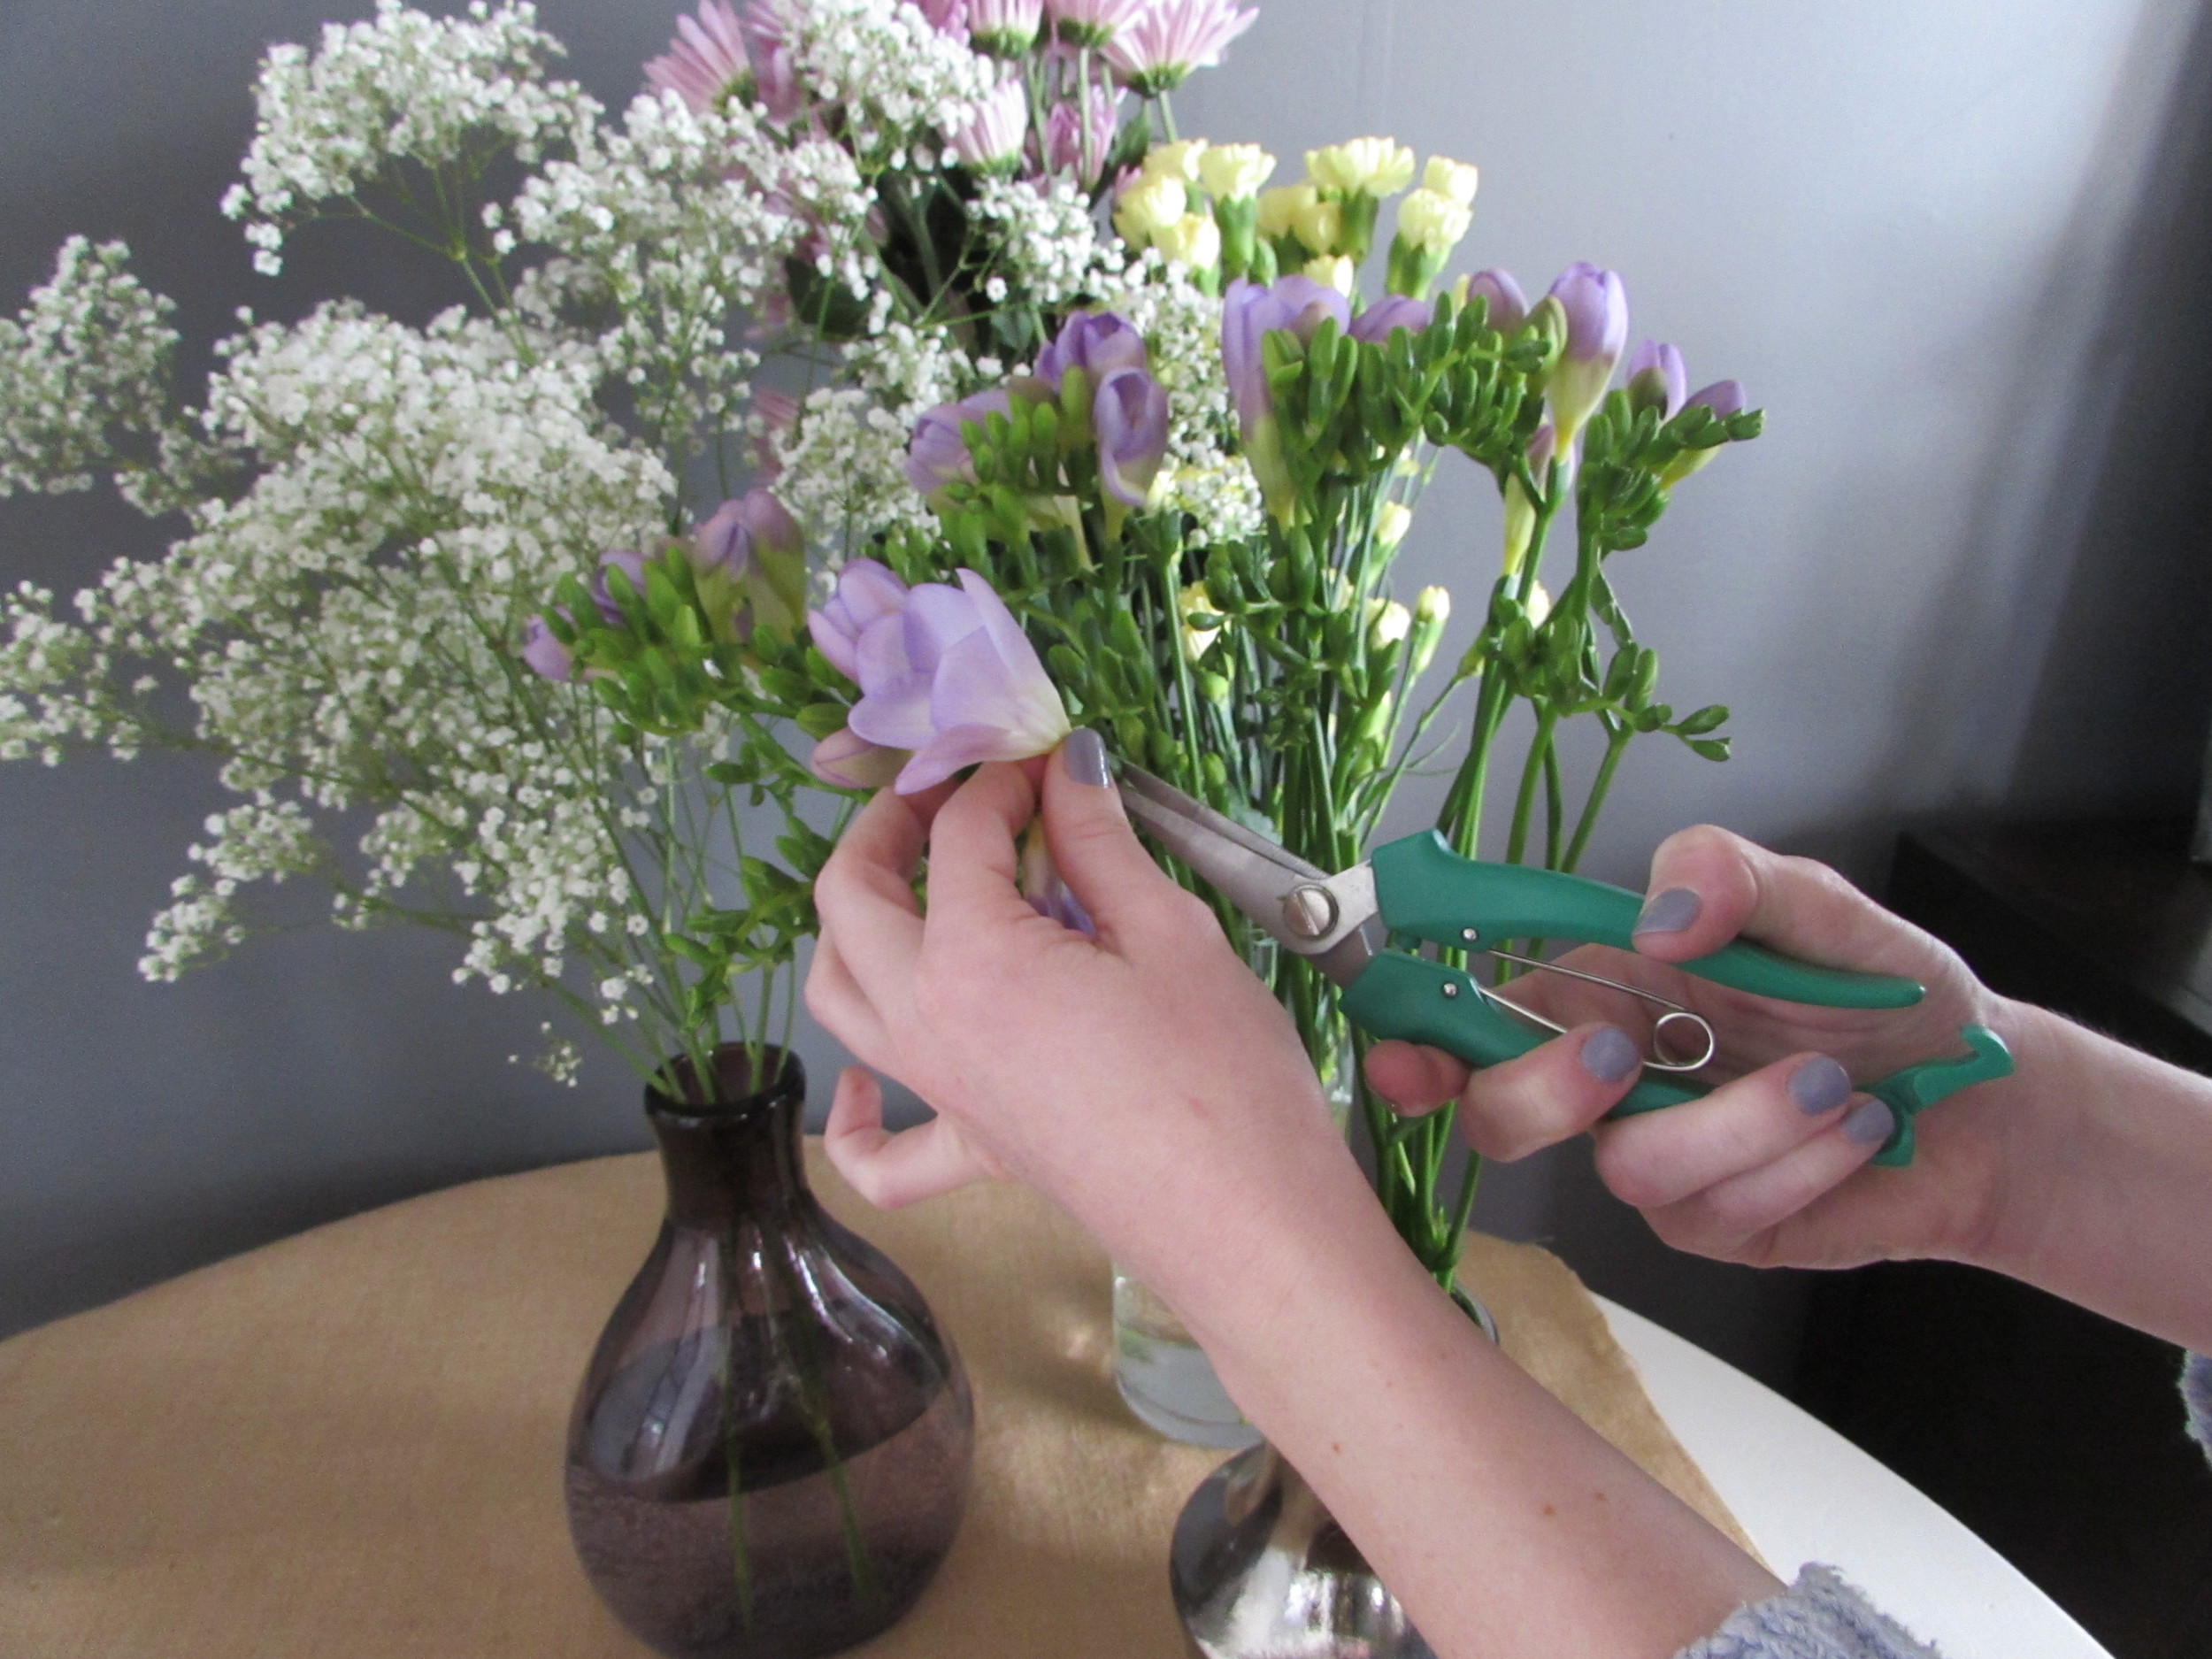
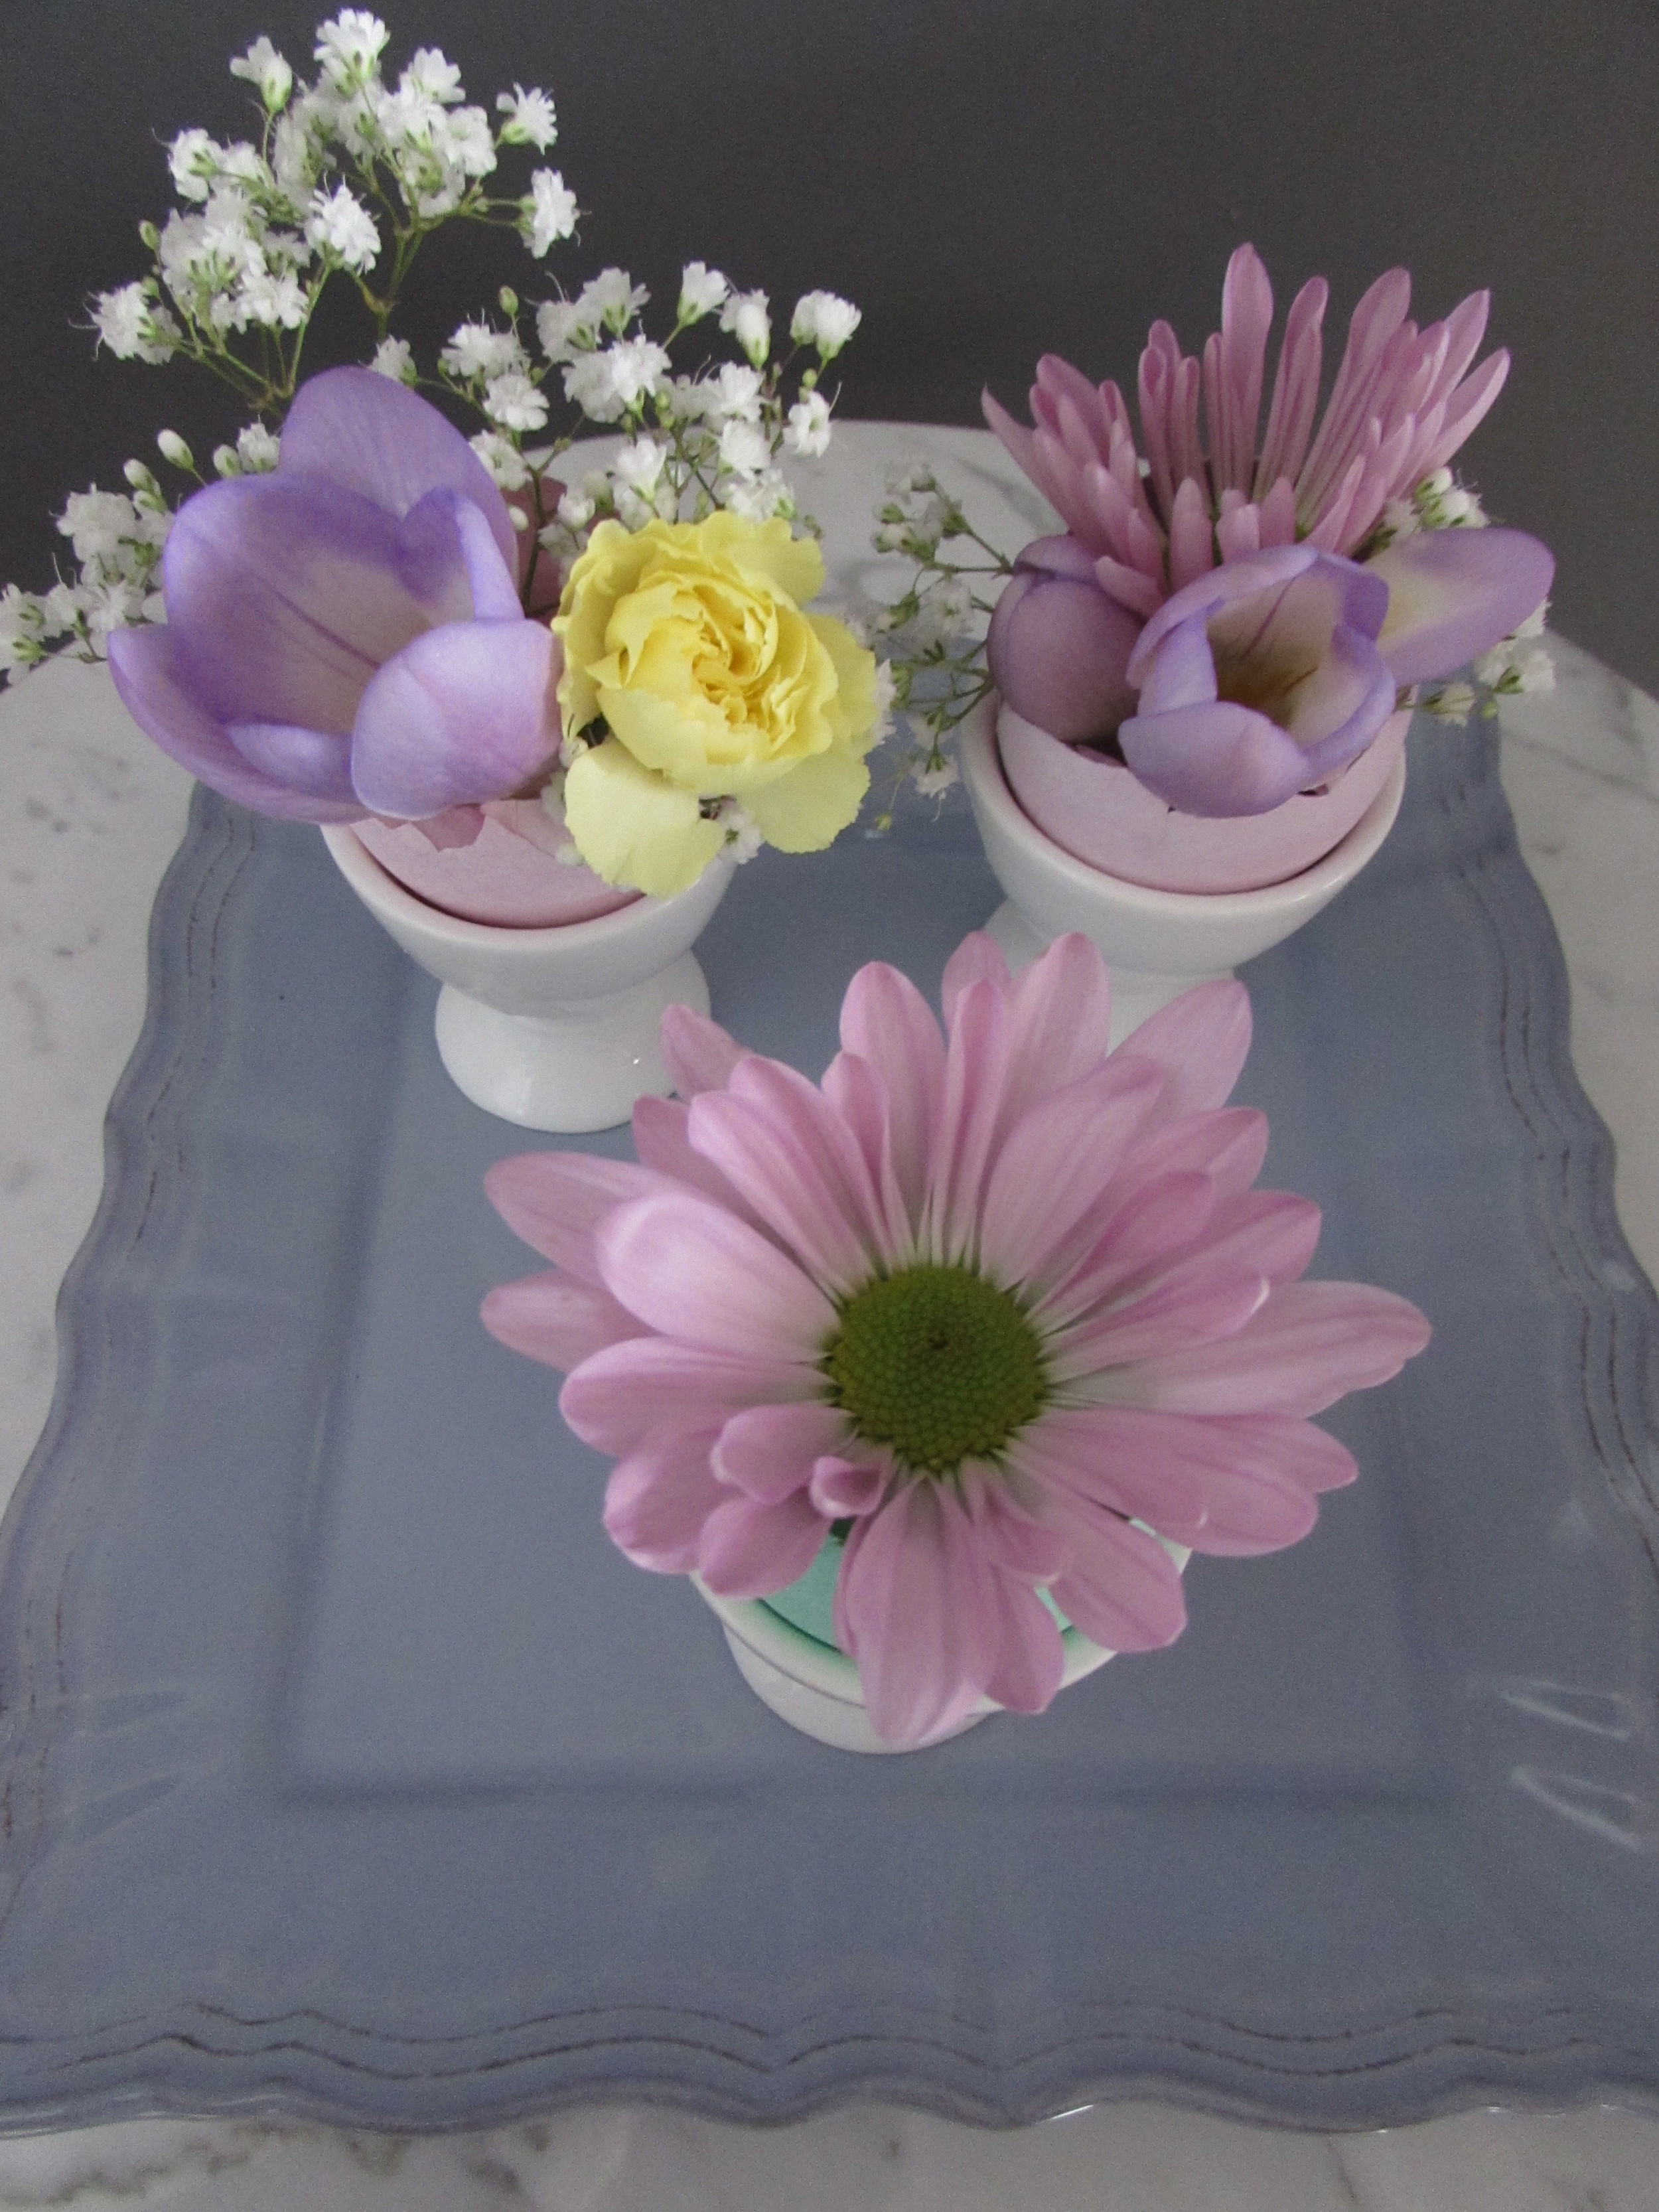
Next, I simply cut short buds and arranged the different flowers in my egg vases. 

Let me know how you will be decorating for this weekend's festivities!

Getting Crafty

I hope the results of my Christmas wrapping and crafting party inspire you to "think outside the gift box" this holiday. The girls were each so creative and unique in their individual themes and ideas--soft and feminine, elegant metallics, and rustic chic. Adding that extra element to your gifts, whether it is a sprig of greenery, a pretty pink ribbon or a handmade tag will be sure to bring a smile to its recipient. It's the personal, thoughtful touches that matter most this time of year, and are always the most memorable. Let your creativity shine!

IMG_1143

IMG_4049

IMG_4056

IMG_4063

IMG_4051

IMG_4052

IMG_4053

IMG_4062

IMG_4055

IMG_4061

IMG_4058

IMG_4059

Plain tags, wrapping paper and ribbon from Creative Bag in Pickering. 

Getting Crafty

It is officially December, so I jumped head first into my Christmas crafting! A Winter terrarium is such an easy and trendy way to change up your holiday decor. It's a great conversation piece and the possibilities for customization are really endless. Personalize yours with your space and taste, and change it up year to year.

List of Items Required:
• Glass jar with lid (mine is from Pineapple Street)
• Faux snow (the snow I used is from the Dollar Store)
• Objects to put on display (my house is from Penney & Co.)
• Time: 5 minutes
• Cost: Roughly $25

Getting Crafty

My friend Emma and I have once again teamed up for this week's Getting Crafty (you will remember her from our Terrarium DIY). This time, we decided to tackle the ever-popular Marquee Light. We will both admit that this was definitely a time consuming project, but totally worth the results (a glass of crafting wine was also key!). For the complete step-by-step guide we followed, click here.

List of Items Required:

  • White foam board (from the Dollar Store)
  • White bristol board (from the Dollar Store)
  • Stencil
  • Cutting board
  • Exacto knife
  • Hot glue gun
  • Pencil
  • Ruler
  • C7 white lights (Canadian Tire)
  • Strong tape
  • Time: Roughly 3 hours
  • Cost: Roughly $15.00
Trace out  your shape, leaving sufficient too for the lights, on the foam board.
Evenly space out your holes for the lights and trace a circle the width of the bottom of the light bulb (the green part).
Take your time ensuring the spacing is correct. There were 25 lights on a string so we made 25 holes.
Next, carefully cut out each hole (this is a good time to open that bottle of wine and patience...)
Now cut out strips using the bristol board to make your shape 3-D. Our strips were roughly 2.5 inches wide.
Using the glue gun, attach the strips.
Insert the lights and voila!